Get information about users in AD-group

The below batch-code (.bat) will ask you for an AD-group. It will then run the command net group for the entered AD-group. Paste the result to a temporary text file and open that text file in Notepad for you to view and search through.

@echo off
set /p gname="Enter groupname: "

net group /domain %gname% > C:\temp\groupoutput.txt
notepad C:\temp\groupoutput.txt

Get information about users AD-groups

The below batch-code (.bat) will ask you for an AD-user name. It will then run the command net user for the entered user. Paste the result to a temporary text file and open that text file in Notepad for you to view and search through.

NB! It is also possible to use the command gpresult, if the command net user doesn’t work for you.

@echo off
set /p uname="Enter username: "

net user /domain %uname% > C:\temp\useroutput.txt
REM gpresult /user %uname% /R > C:\temp\useroutput.txt
notepad C:\temp\useroutput.txt


Installing and configuring an DB2 ODBC CLI-driver on Windows

An DB2 CLI-driver is a self-sufficient driver that supports a subset of the functions that are provided by the DB2 ODBC-driver.

First download the DB2 ODBC CLI-driver from IBM’s homepage. As such you don’t need to install the driver. You just need to copy it to the location where you want it to reside.
In the below example the directory for the driver is: C:\Software\DB2_ODBC\
The file downloaded from the IBM-homepage is then unpacked into the directory v10.5fp11_nt32_odbc_cli

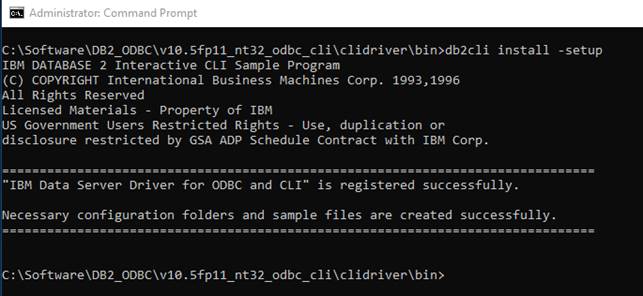
When the driver is unpacked go to the directory bin. In this directory you need to execute the command db2cli install -setup. This installs/makes the driver visible inside ODBC Data Sources in Windows.

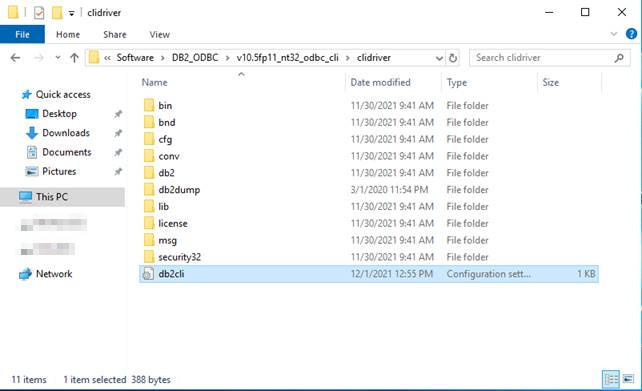
Now you need to create or copy an existing db2cli.ini file to the directory (in this example): C:\Software\DB2_ODBC\v10.5fp11_nt32_odbc_cli\clidriver

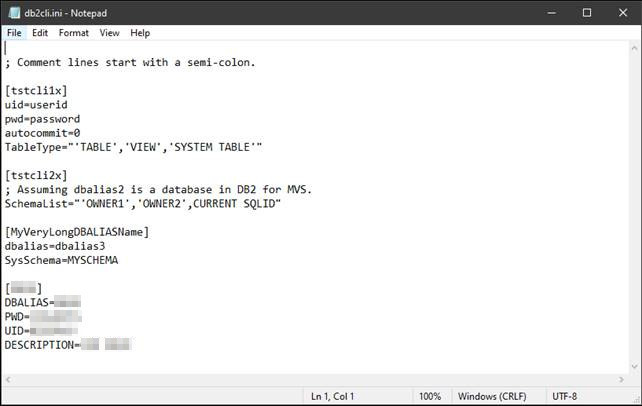
Below is an example of what the contents of an db2cli.ini file could be. The db2cli.ini file is “just” a file containing meta-information about the alias that you want to use for you driver inside ODBC Data Sources in Windows.

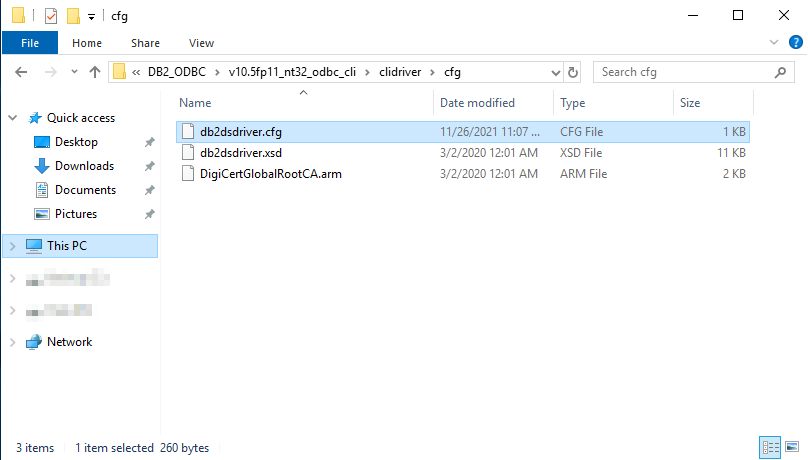
Now you need to create or copy an existing file db2dsdriver.cfg. This file is to be placed in the directory (in this example): C:\Software\DB2_ODBC\v10.5fp11_nt32_odbc_cli\clidriver\cfg

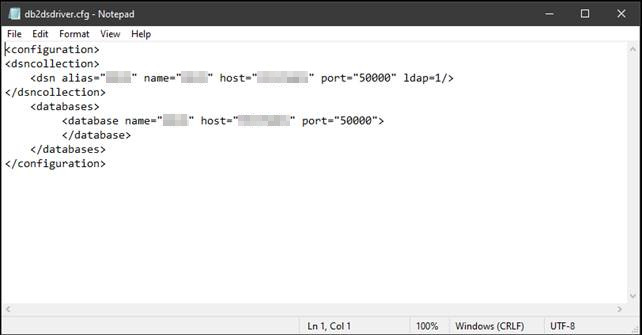
Below is an example of what the contents of an db2dsdriver.cfg file could be. The db2dsdriver.cfg file contains the more technical information about the alias that you created in the db2cli.ini file. Therefore, the alias in this file must correspond to an alias in the db2cli.ini file. Pointing the alias in the db2cli.ini file to a server and database.

NB! The port number (port=”50000”) in the example below doesn’t have to be the port number used on your system. This is just the default port number for an DB2-instance.

Installing a terminal server on Microsoft Windows Server

The below blog post will show you how to install make a Microsoft Windows Server a Terminal Server. This was done on a Microsoft Windows Server 2019 Datacenter.

A Terminal Server makes it possible for multiple users to access a Windows Server through Remote Desktop (also called RDP). A normal Windows Server installation is limited to two (2) multiple users.

First off you need to get Terminal Services installed on the Windows Server if this is not already installed.

1.
To do this you need to start Windows PowerShell as an administrator and execute the command below.

Command: Install-WindowsFeature RDS-RD-Server -IncludeManagementTools

2.
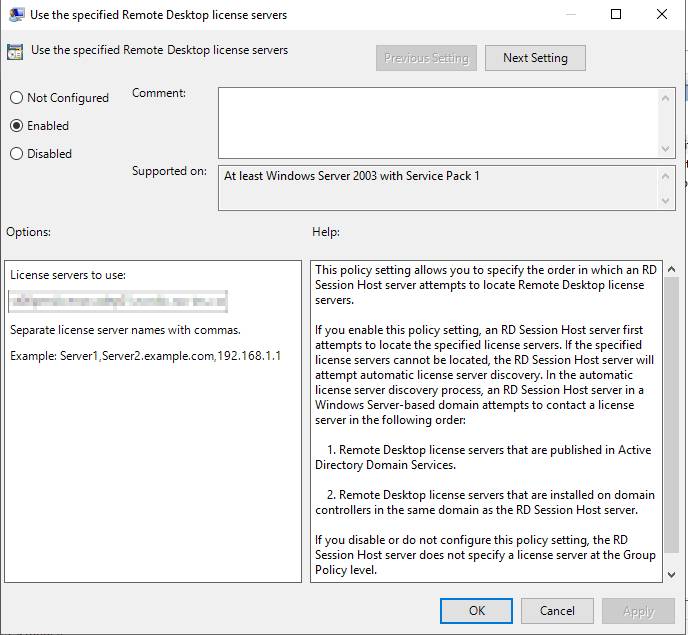
Then you need to set the license server under in the Local Group Policy Editor. This is done from the Edit Group Policy located in the Control Panel.

Go to Computer Configuration\Administrative Templates\Windows Components\Remote Desktop Services\Remote Desktop Session Host\Licensing

And choose Use the specified Remote Desktop license servers to set the server.

Here you need to insert the license server provided.

3.
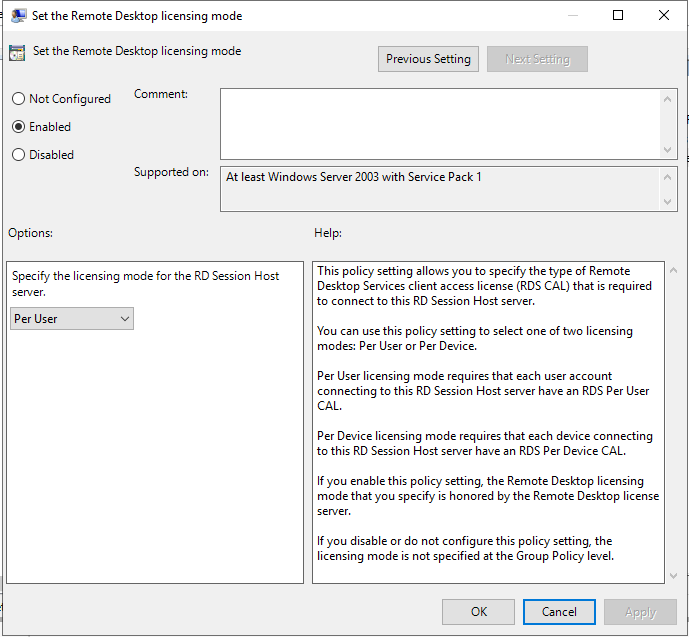
Then you need to set the license mode under in the Local Group Policy Editor. This is done from the Edit Group Policy located in the Control Panel.

Go to Computer Configuration\Administrative Templates\Windows Components\Remote Desktop Services\Remote Desktop Session Host\Licensing

And choose Set the Remote Desktop licensing mode

Here you most likely want to choose Per User

Scanning all SAS-programs on server

The commands below will scan all *.sas files and look for the text proc. It will of course be possible to use any other string instead of proc. This scenario can be used to scan all your SAS-programs for the usage of SAS-procedures. Be aware that you need to be administrator or run the command as administrator to have access to all folders.

Linux
It will scan from the root of a server and go recursively through all the subfolders it encounters. It will pipe the result of the scan to the file linuxsasproc.txt in the folder where you start the execution of the command – this can of course be changed if you want to.

grep --include=\*.sas -rinw '/' -e 'proc' > linuxsasproc.txt

NB! The –include has two – -.

Output in linuxsasproc.txt. The file is delimited by : (colon)
<Location of SAS-program containing the search string>:<Line number in the file where the search string is found>:<The line that includes the search string>

Example
/sas/sasprogram.sas:24:proc sql;

Addition
In Linux I found that the command find has a maxdepth-option. This option makes it possible to decide, how far down a folder hierarchy a search should be preformed.
For example -maxdepth 1 will not search subfolders. This means that the command below will only search for files (-type f) in all folders matching  the folders with wildcard ./sasjobs/runningtime_*/ – but not subfolders of these folders.

find ./sasjobs/runningtime_*/ -maxdepth 1 -type f > result.txt

Windows
It will scan through all subfolder from the location where you start the program. It will pipe the result of the scan to the file winsasproc.txt in the folder where you start the execution of the command – this can of course be changed if you want to.

findstr /s /i proc *.sas > winsasproc.txt

NB! Be aware, that the DOS-commando findstr has an ‘Out of Memory‘ flaw.
Therefore, it can be better to use PowerShell, if this is available for you. The PowerShell command can look something like the below

Get-ChildItem -Path <PATH TO SCAN>:\*.sas -Recurse | Select-String -Pattern 'PROC' | Out-File "<FILE TO CONTAIN OUTPUT>"

An example below

Get-ChildItem -Path C:\*.sas -Recurse | Select-String -Pattern 'PROC' | Out-File "C:\output\sasscanoutput.csv"

Output in winssasproc.txt. The file is delimited by : (colon)
<Location of SAS-program containing the search string>:<The line that includes the search string>

Example
Documents\sasprogram.sas:proc sql;
Getting first megabytes of large file

You can use the DOS-command TYPE and MORE to get the first megabytes or gigabytes of a large file e.g. of TXT, XML, CSV etc.
This is done by piping the result into another file, there by getting only the first part of the file piped into the new file.

The DOS-command below will start piping the large file into the smaller new file.

type LARGE_SOURCE_FILE | more > SMALL_DESTINATION_FILE

You are not able to see the result from the DOS-command. You need to press the SPACE-key on your keyboard, because every time you press the SPACE-key a new page of the file will be showed and thereby piped into the SMALL_DESTINATION_FILE.
When you think you have done this enough times, then you have to press CTRL-C on your keyboard, this will terminate the type-command and you will have the SMALL_DESTINATION_FILE containing data from the LARGE_SOURCE_FILE.

Be aware that you will get the — more — pipe text in the file!

Disable fair sharing in Windows Server

The post below will show how to disable fair sharing of CPU, disk and network in Windows Server 2012/2012R2. The post relies on information found in here and here.
It’s possible to disable it directly in the Windows Registry with the program RegEdit.exe or using PowerShell commands. Both approaches will be shown.
Disclaimer: Do a backup of Windows Registry in RegEdit.exe (File -> Export, remember to choose Export Range = All) before doing these changes!

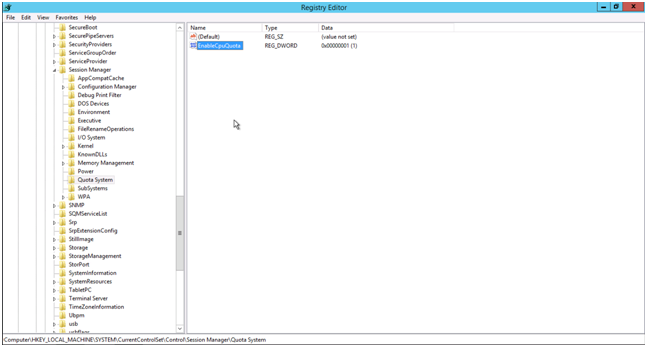
It’s possible to disable fair sharing of the CPU using Regedit.exe. You have to change the value EnableCPUQuota from 1 to 0 (zero). NB! You change it by double-clicking on EnableCpuQuota. This value can be found in HKEY_LOCAL_MACHINE\SYSTEM\CurrentControlSet\Control\Session Manager\Quota Systemreg1

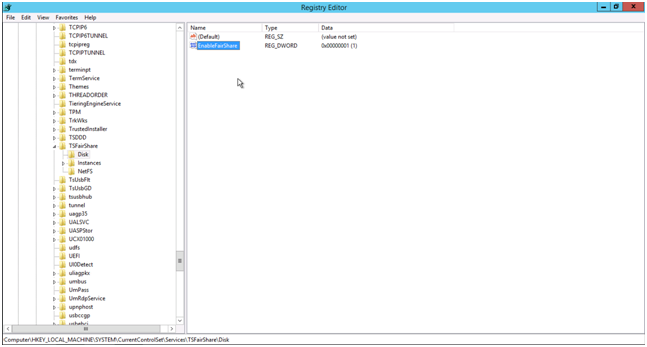
It’s possible to disable fair sharing of the disk using Regedit.exe. You have to change the value EnableFairShare from 1 to 0 (zero). This value can be found in
HKEY_LOCAL_MACHINE\SYSTEM\CurrentControlSet\Services\TSFairShare\Disk

reg2

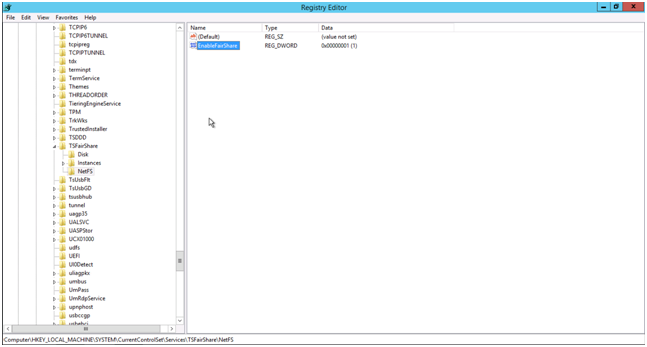
It’s possible to disable fair sharing of the network using Regedit.exe. You have to change the value EnableFairShare from 1 to 0 (zero). This value can be found in
HKEY_LOCAL_MACHINE\SYSTEM\CurrentControlSet\Services\TSFairShare\NetFS

reg3

It is also possible to do this through PowerShell where you write the command below

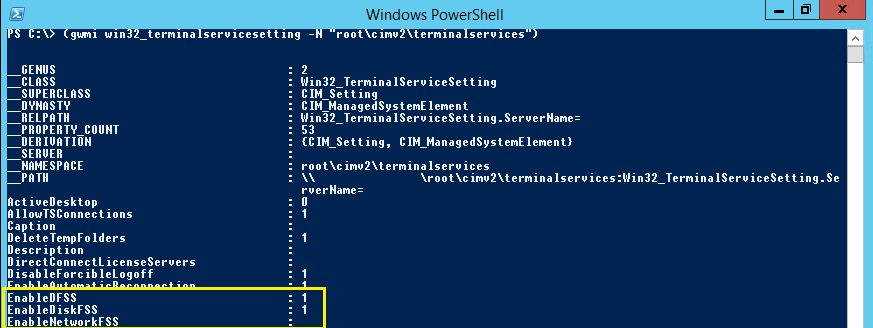
(gwmi win32_terminalservicesetting -N "root\cimv2\terminalservices")

This will give you a list of the settings for terminalservices as shown below. You are interested in EnableDFSS, EnableDiskFSS and EnableNetworkFSS. For some reason EnableNetworkFSS is not set here.

PSFairShare

To disable CPU fair sharing in PowerShell you write.

$temp = (gwmi win32_terminalservicesetting -N "root\cimv2\terminalservices")
$temp.enableDFSS = 0
$temp.put()

To disable disk fair sharing in PowerShell you write.

$temp = (gwmi win32_terminalservicesetting -N "root\cimv2\terminalservices")
$temp.enableDiskFSS = 0
$temp.put()

To disable network fair sharing in PowerShell you write.

$temp = (gwmi win32_terminalservicesetting -N "root\cimv2\terminalservices")
$temp.enableNetworkFSS = 0
$temp.put()

Test network connection with ping

With the ping command it is possible to test a network connection

ping <HOST> -t –l 1000

Example ping 8.8.8.8 –t –l 1000 (8.8.8.8 is Googles public DNS-server)

If you run it from a command prompt in windows, it will look as below. The option -t will force the ping command to run until you stop it. It’s possible to stop it by pressing Ctrl-C on the keyboard. The -l option tells ping how many bytes to send with each ping, in this case it’s a 1000 bytes.pingIf you want the result of the test to be sent to a file you can send it to a file using the command below.

ping 8.8.8.8 –t –l 1000 > MyTestFile.txt

When the test is done you can look for Request Timeout in the output.