Installing and configuring an SAS OLEDB-driver for MSSQL

To get the correct SAS OLEDB driver or newest SAS OLEDB driver. It is best to do a search e.g. on Google.
NB! You need an account at SAS to be able to download.

And even thou this guide for Installing and configuring an SAS OLEDB-driver for MSSQL is old – it is still very useful.

Be aware, that it is possible to code a program in e.g. .NET that reads a SAS-dataset. It can be done with the SasReader (currently in version 1.0.6).

Below code in C# reads a SAS-dataset and outputs it into a .CSV-file.
Credits to my colleague that figured this out.

using System;
using System.IO;
using SasReader;
using System.Text;

namespace SasToCsvConverter
{
    class Program
    {
        static void Main(string[] args)
        {
           // Define paths
           // string sasFilePath = @"C:\temp\<YOUR SAS-DATASET>.sas7bdat";
           // string csvFilePath = @"C:\temp\output.csv";
            try
            {
                // Initialize SAS file reader
                using (FileStream sasToParseFileInputStream = File.OpenRead(sasFilePath))
                {
                    SasFileReader sasFileReader = new SasFileReaderImpl(sasToParseFileInputStream);

                    // Open the CSV file for writing
                    using (var writer = new StreamWriter(csvFilePath, false, Encoding.UTF8))
                    {
                        // Read and write META DATA
                        var sasMetaColumns = sasFileReader.getColumns();

                        // Write header
                        var headerNames = new StringBuilder();
                        foreach (var column in sasMetaColumns)
                        {
                            headerNames.Append(column.getName()).Append(",");
                        }

                        // Remove the trailing comma
                        writer.WriteLine(headerNames.ToString().TrimEnd(','));

                        // Write DATA
                        long rowCount = sasFileReader.getSasFileProperties().getRowCount();
                        for (int i = 0; i < rowCount; i++)
                        {
                            var row = sasFileReader.readNext(); // object[]
                            var rowValues = new StringBuilder();
                            foreach (var value in row)
                            {
                                var stringValue = value?.ToString() ?? string.Empty;
                                rowValues.Append(EscapeCsvValue(stringValue)).Append(",");
                            }

                            // Remove the trailing comma
                            writer.WriteLine(rowValues.ToString().TrimEnd(','));

                            // Optional: Log progress
                            Console.WriteLine($"Processed row {i + 1}/{rowCount}");
                        }
                    }
                }

                Console.WriteLine("Conversion to CSV completed successfully.");
            }

            catch (Exception ex)
            {
                Console.WriteLine($"An error occurred: {ex.Message}");
            }
        }

        private static string EscapeCsvValue(string value)
        {
            if (value.Contains(",") || value.Contains("\"") || value.Contains("\n"))
            {
                return $"\"{value.Replace("\"", "\"\"")}\"";
            }
            return value;
        }
    }
}
Installing and configuring an DB2 ODBC CLI-driver on Windows

An DB2 CLI-driver is a self-sufficient driver that supports a subset of the functions that are provided by the DB2 ODBC-driver.

First download the DB2 ODBC CLI-driver from IBM’s homepage. As such you don’t need to install the driver. You just need to copy it to the location where you want it to reside.
In the below example the directory for the driver is: C:\Software\DB2_ODBC\
The file downloaded from the IBM-homepage is then unpacked into the directory v10.5fp11_nt32_odbc_cli

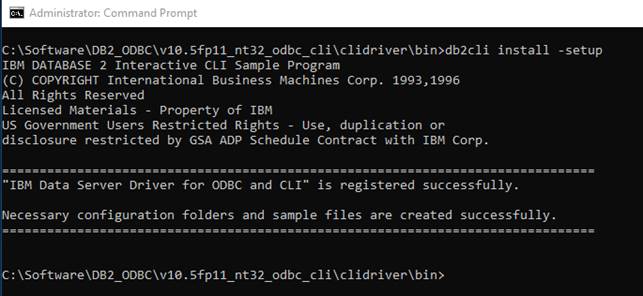
When the driver is unpacked go to the directory bin. In this directory you need to execute the command db2cli install -setup. This installs/makes the driver visible inside ODBC Data Sources in Windows.

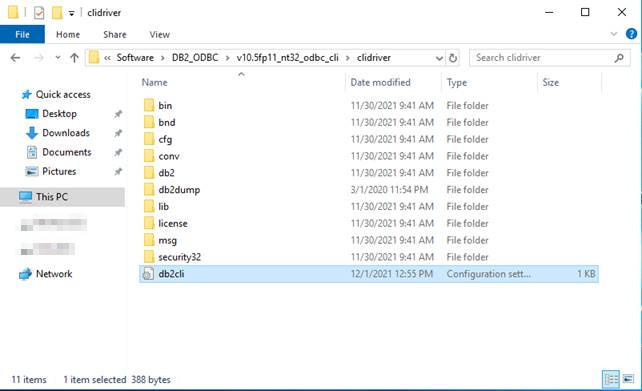
Now you need to create or copy an existing db2cli.ini file to the directory (in this example): C:\Software\DB2_ODBC\v10.5fp11_nt32_odbc_cli\clidriver

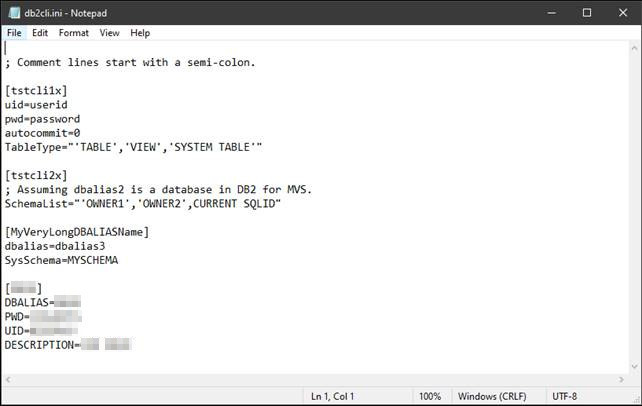
Below is an example of what the contents of an db2cli.ini file could be. The db2cli.ini file is “just” a file containing meta-information about the alias that you want to use for you driver inside ODBC Data Sources in Windows.

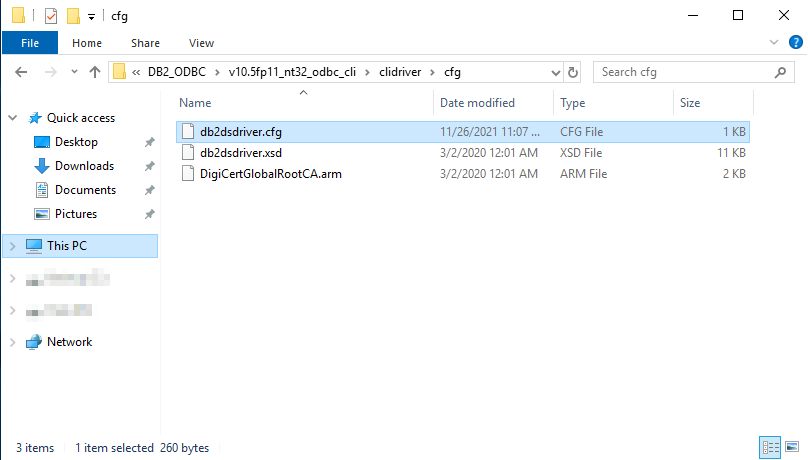
Now you need to create or copy an existing file db2dsdriver.cfg. This file is to be placed in the directory (in this example): C:\Software\DB2_ODBC\v10.5fp11_nt32_odbc_cli\clidriver\cfg

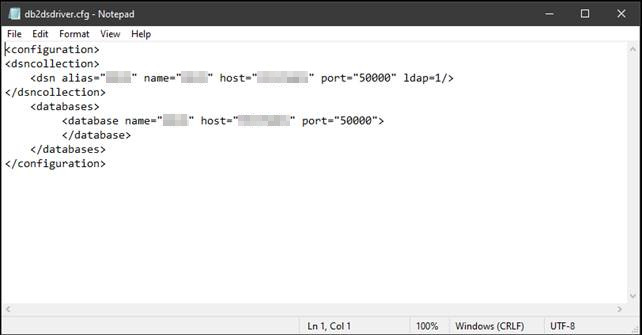
Below is an example of what the contents of an db2dsdriver.cfg file could be. The db2dsdriver.cfg file contains the more technical information about the alias that you created in the db2cli.ini file. Therefore, the alias in this file must correspond to an alias in the db2cli.ini file. Pointing the alias in the db2cli.ini file to a server and database.

NB! The port number (port=”50000”) in the example below doesn’t have to be the port number used on your system. This is just the default port number for an DB2-instance.